 Veliana Thong
Feature toggle is a software development technique allowing developers to modify system behaviour during run time without code change[1]. Feature toggle is used to enable or disable features. We can for example enable some features for testing even before they are ready for release, but disabled these same features in production.
LaunchDarkly is a feature flag rather than a feature toggle[2]. A toggle implies a two-state condition while a flag can return multiple states or values. In this blog I’m just going to show you how to use LaunchDarkly as a feature toggle to keep things simple.
Project environments
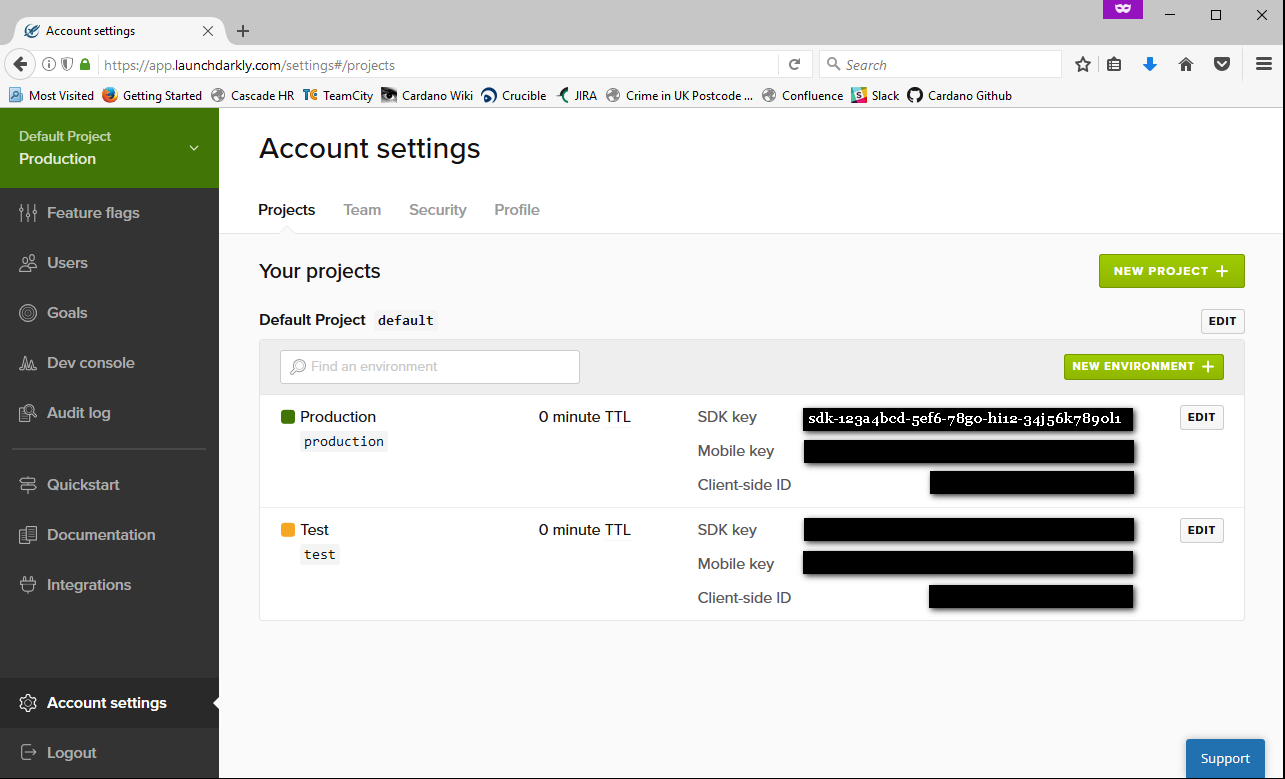
By default LaunchDarkly provides 2 environments, Production and Test. This can be managed in Account settings
Feature flags
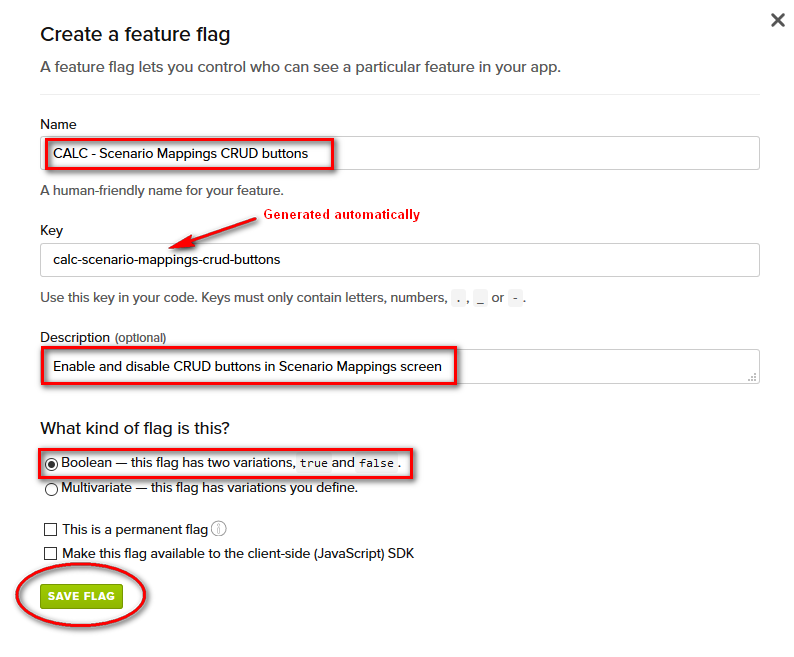
Create a new feature flag by entering:
- Name
- Key
- Description (optional)
- Flag type
Note that Key is generated automatically as we type in Name. We can alter this if we’re not happy with the auto generated Key. Before saving the flag, please make sure you’re happy with the Key representation. As far as I’m aware, there’s no way we can edit the Key once the flag is created. We will need to delete the whole flag and create a new one with the desirable Key representation. The Key is important here as it is going to be used in your application.
Using LaunchDarkly in your C# application
- First thing you need to do is install LaunchDarkly SDK using NuGet in the appropriate project of your C# solution.
- Import the LaunchDarkly package to your class.
- Create a new LdClient with your environment-specific SDK key. I'm using Production SDK key here.
- Create a user. I'm only interested in the user name and machine name. You can adjust this according to your need.
- Retrieve LaunchDarkly toggle value.
- Use this
isEnabledvalue where you want to enable or disable features in your application.
I'm using LaunchDarkly in CALC to disable the CRUD buttons in Scenario Mappings screen. I already have a view model with a logic that determines whether the CRUD buttons need to be enabled or disabled, so all I need to do is just append this boolean value to the existing logic.
Install-Package LaunchDarkly.Clientusing LaunchDarkly.Client;var client = new LdClient("sdk-123a4bcd-5ef6-78g0-hi12-34j56k7890l1");var user = User.WithKey(System.Environment.UserName)
.AndSecondaryKey(System.Environment.MachineName);var isEnabled = client.BoolVariation("calc-scenario-mappings-crud-buttons", user);isEnabled returns true if the feature flag is switched ON and returns false if the feature flag is switched OFF.

Dev console and run result
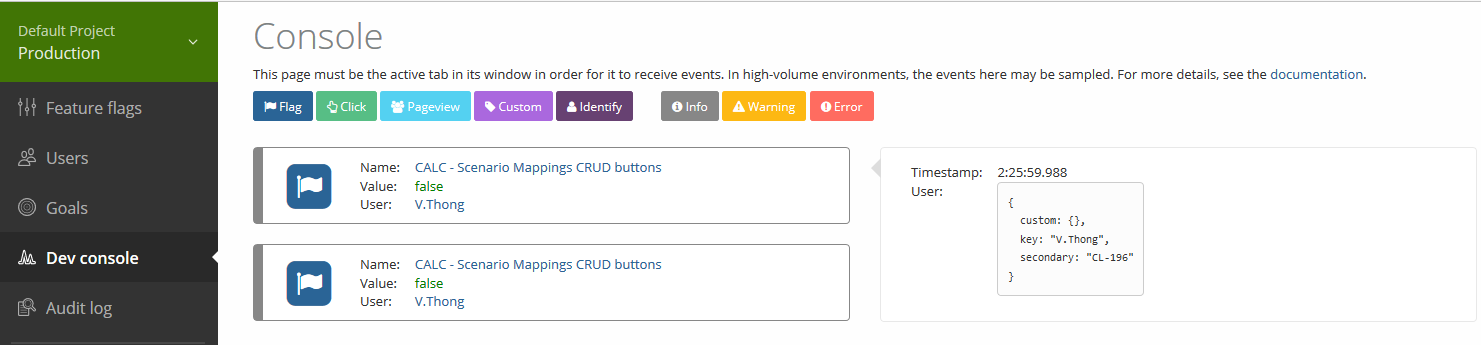
Dev console is a handy event listener, it’ll show events as they stream in, live. Have this console open before you run your application.
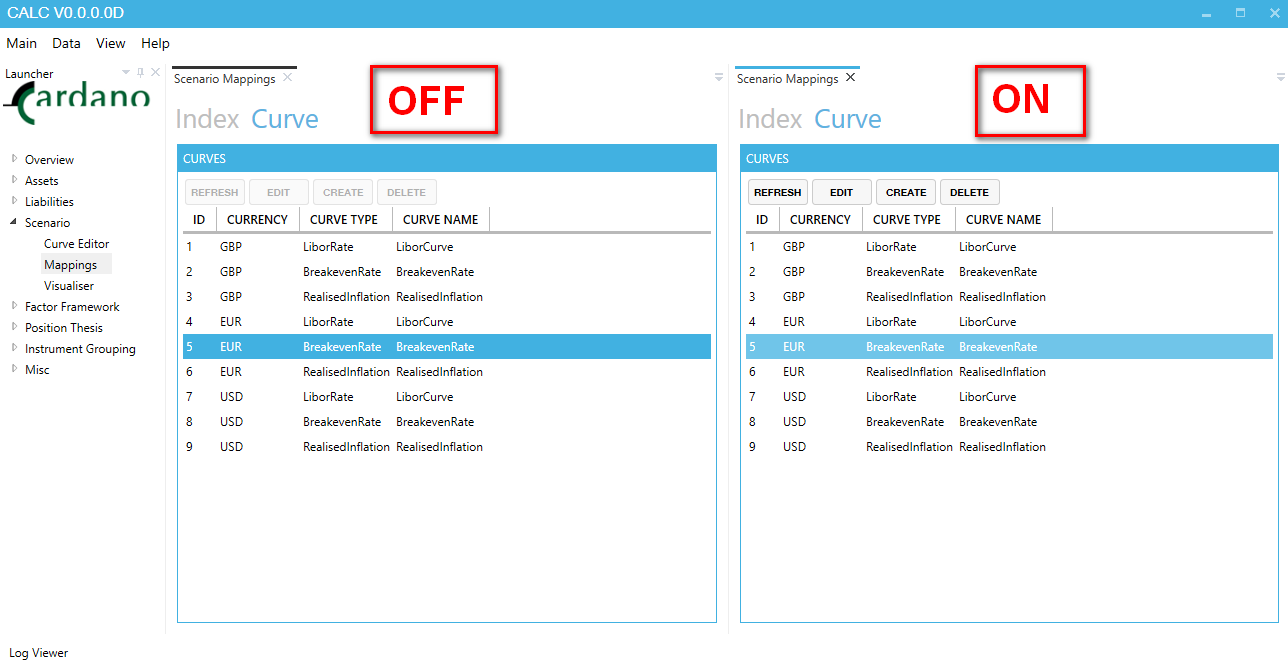
I’ll run CALC with the feature flag first switched OFF and then switched ON so we can see the different effects.
On the left tab, we see that when the flag is switched OFF, the CRUD buttons are all disabled. On the right tab, when the flag is switched ON, the CRUD buttons are enabled.
Dev console shows the following when the flag is switched OFF
When flag is switched ON
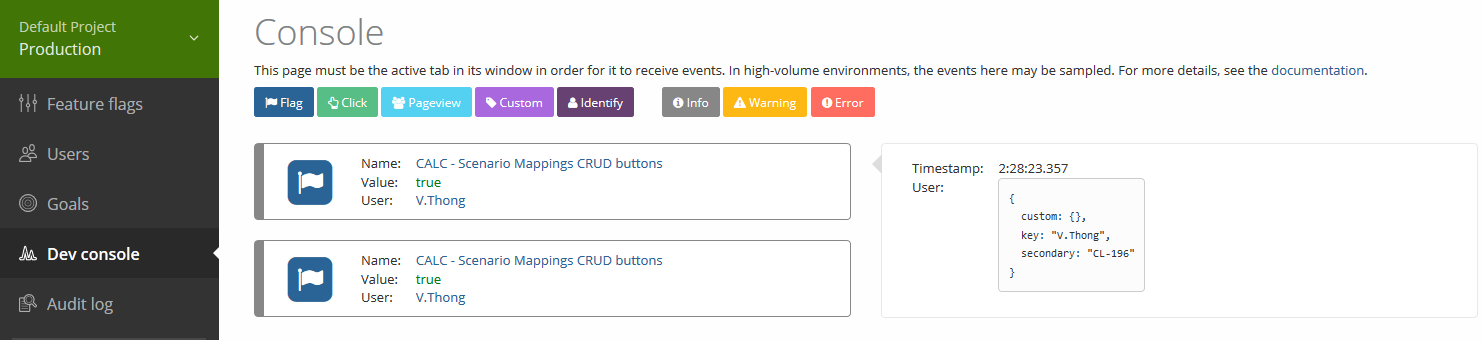
Note that the reason why the Dev console show 2 events is because we have 2 tab items (Index and Curve) in the Scenario Mappings screen.